DIY Bamboo Wind Chimes

About a month ago I got some beautiful bamboo for my garden. Half of it took, and the other half died leaving me with 4 stocks of leafless bamboo. “I have got to do something with this,” I thought. Finally today it dawned on me - a wind chime! I cut the dead bamboo stocks down and made this lovely wind chime with things I had around the house. The best part - NO POWER TOOLS REQUIRED! P1150103

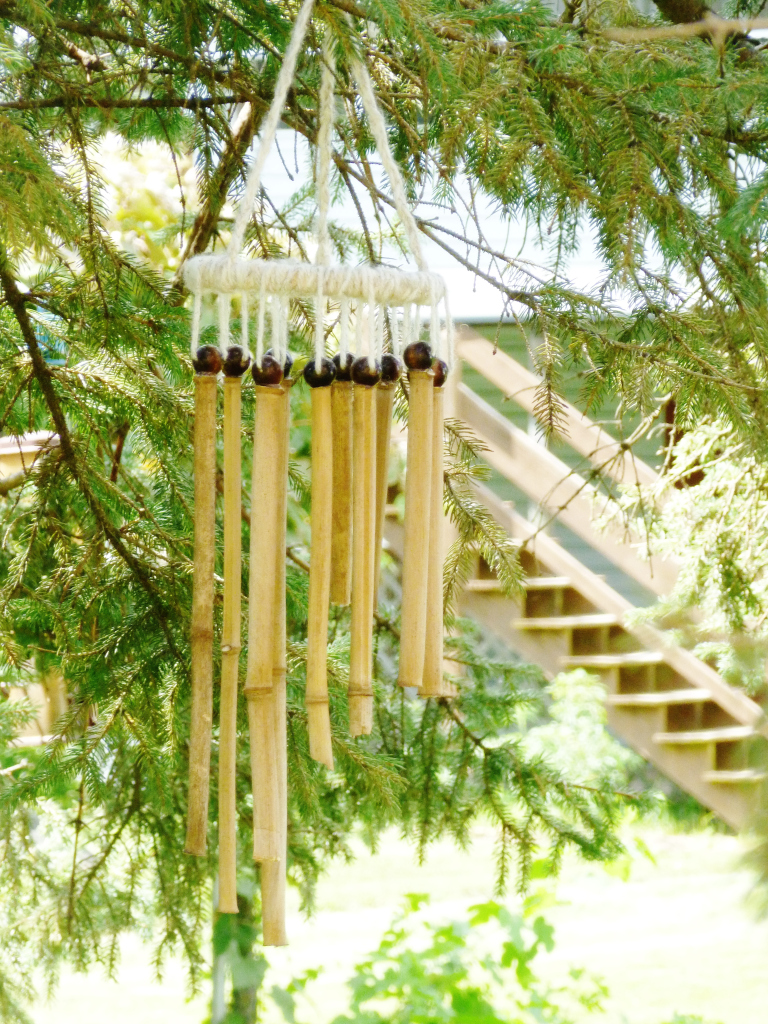
Here’s how we did it!
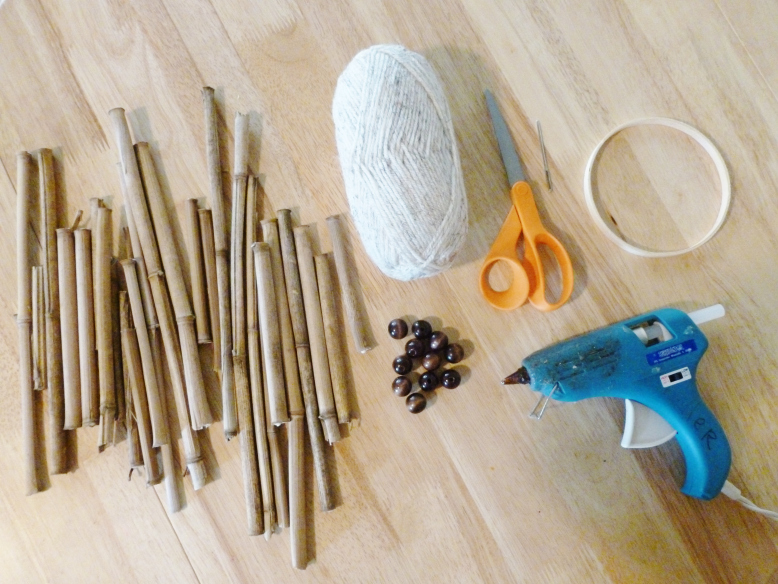
Materials:

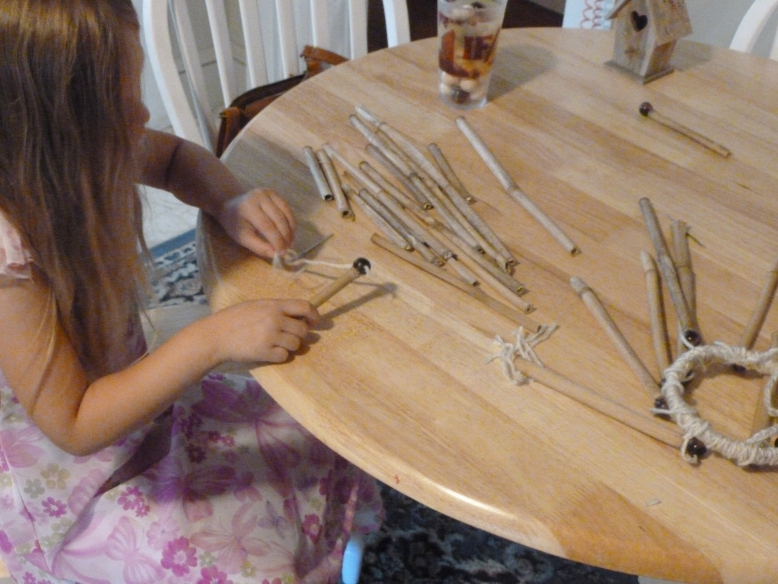
  • 9-16 bamboo stocks snapped (or cut) into pieces measuring between 6-12 inches
  • Worsted weight yarn (Pictured: Vanna’s Choice Wheat)
  • Wood Beads
  • Cross stitch hoop ( If you do not have one of these you could also take 3 pieces of bamboo and glue or tie them together into a triangular shape)
  • Glue Gun and Glue Sticks
  • Scissors
  • Finishing Needle

P1150085

Wrap the yarn all around your cross stitch hoop.

P1150089

Cut 9 strands of additional yarn that each measure 26 inches. Separate this yarn into 3 piles of 3 strands. At three points in the circle loop 3 strands around the circle and double knot. Braid the remaining yarn and tie all three braided sections together at the top.

P1150090

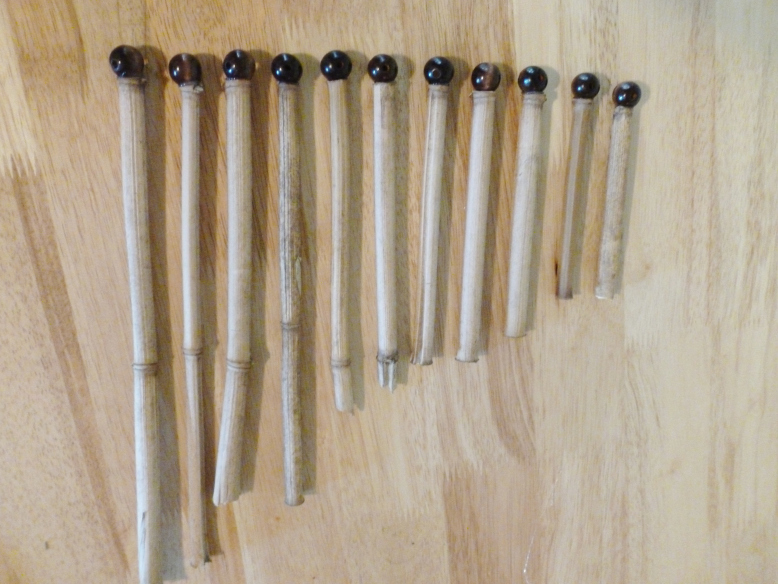
Cut or snap your bamboo into succeeding lengths measuring 6 - 12 inches. Use your hot glue gun to attach a wood bead to the top of each stick. Leave the beads holes exposed on the left and right.

P1150087

Use the finishing needle to thread yarn through the holes of the wood beads and then tie them to your circle. I triple knotted them for optimal security.

P1150091

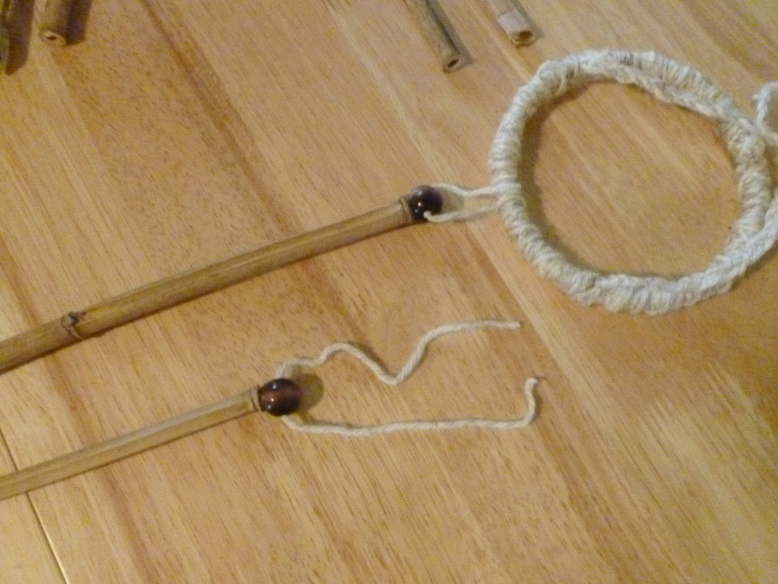
Start with the longest stick and work your way around the the circle placing the sticks from longest to shortest. Snip any additional yarn near the knot and hide the knot inside the bead.

P1150092

Once all your bamboo sticks are attached hang your wind chime outside and enjoy!

PINTEREST

Visit my Etsy Shop. Follow me on Facebook, Instagram, and Twitter.

DIY Yarn Wall Hanging

Have you seen these beautiful yarn hangings all over pinterest lately? Me too. P1140997

They add a beautiful dash of color and a hint of bohemian style to any room. The best part - SO EASY! Little Bo Peep and I made one the other day and we both had such a great time. I knew I had to share this easy project with all of you.

Just a little PS before we start - these instructions are super adaptable. Make things whatever length you want - with whatever yarn you want - with those fab sparkling beads you’ve been eyeing, with a stick from your back yard. You really can’t go wrong. Here’s exactly what we used for ours:

Materials:

  • Bamboo stick measuring approx 23 inches
  • DK Weight Yarn (approx 150 yards)
  • Tape Measure
  • Scissors
  • Wood Beads with holes large enough for the yarn to fit through

Instructions:

Cut all your yarn into 56 inch strips. You will be doubling them over so cut them twice as long as you want them to hang. Take 3 strips and fold them in half creating a loop at the top. Place the loop under the stick and pull the ends of the yarn through the loop. Pull tight to form a knot. Repeat with all your yarn strips. After you have all your yarn strips tied onto your stick thread the beads onto the yarn wherever you like. Thread them into the appropriate amount of yarn so that they will stay in place without you having to tie a knot.

P1140994

Of course I had some Barbra playing in the background

Next cut one more strand of yarn that measures approx 2 feet. Secure this yarn to either side of hanging with a triple knot. This is how you hang the project.

Lastly give your wall hanging a trim! You will most likely have some stray strands at this point. Grab those scissors and get creative! Viola! Hang and enjoy!

The colors looked perfect in my daughter’s room and she loves it! We had a bunch of wooden beads left over so she made a necklace with the leftovers. I hope your enjoy this DIY yarn wall hanging as much as we did!

P1150001

We love being social! If you make one we’d love for you to share it on our facebook page so we can like, comment, and share you handy work!

DIY Orange Bird Feeder

I love crafts of all kinds. The word DIY is a constant in my vocabulary. So when you can combine mommy/daughter time, a DIY project we can do together, and a way we can all get out and enjoy the garden I”m in heaven (Insert Fred Astaire singing in the background 🎶 Heaven I’m in Heaven 🎶 )

Here’s a fun easy project you can do with items you have around the house - An Orange Bird Feeder!

What you’ll need:

  • 2 oranges
  • 3/4 cup oats (I used Nature’s Promise quick oats from Giant)
  • 1/2 peanut butter
  • Yarn (I used my favorite Lion Brand Wool Ease Thick and Quick)
  • Knife, Spoon, and Bowl
  • A nail
  • A finishing needle (optional but very helpful)
  • Handful of Raisins/peanuts/sunflower seeds (Your pick - just use what ya got!)
Step 1: Hollow out oranges

Step 1: Hollow out oranges

STEP 1: Cut the oranges in half and hollow out the oranges. I used a knife to loosen the fruit and then let my daughter scoop out the insides.

Step 2: Make holes and add yarn

Step 2: Make holes and add yarn

STEP 2: Use your nail to poke a hole on the sides of each orange rind. Make sure the holes are directly opposite each other so that the orange will be level when you hang it (I learned that the hard way). Thread your finishing needle with yarn and thread the yarn from one side to the other.

Step 3: Make filling

Step 3: Make filling

STEP 3: Mix oats, peanut butter, and a handful of raisins/peanuts/sunflower seeds. We used raisins.

Step 4: Fill the oranges

Step 4: Fill the oranges

STEP 4: Fill the oranges with your oat/peanut butter mixture.

P1140861

Step 5: The fun part - decorate!

STEP 5: My daughter’s favorite part! Decorate! Use extra raisins/peanuts/sunflowers seeds to make smiley faces, hearts, stars - whatever makes you happy!

Step 6: Hang em'

Step 6: Hang em’

P1140867

STEP 6: Hang your feeders from a tree or shepherds hook. I found it’s easiest if you wait to tie the ends until you have it on the tree.

Step 7: Enjoy!

Step 7: Enjoy!

STEP 7: Enjoy! Why not set a special tea party and watch for chickadees, finches, and cardinals to partake in the goodies you made for them while sipping a cup of earl grey. Or take it from my daughter and strike a fabulous pose! Viola! DIY fun for everyone!

BOPEEPBIRDFEEDER

More DIY fun in my shop - www.etsy.com/shop/BoPeepsBonnets